Key takeaways
- Mounting the strip facing forward instead of toward the wall — this creates glare instead of reducing contrast.
- Choosing a warm-white strip for color-sensitive work and wondering why on-screen whites look slightly blue by comparison.
- Running it at full brightness, which turns a contrast-reducing tool into a second distracting light source.
Bias lighting — a strip of light placed behind your monitor, facing the wall — is one of the cheapest upgrades you can make to a desk setup, and one of the most frequently installed backwards. Here’s how to do it properly.
What bias lighting actually fixes
When a bright screen sits in front of a dark wall, your eyes are constantly adjusting between the two contrast levels every time you glance away and back. Over hours, that’s a real contributor to eye fatigue. Bias lighting doesn’t make your screen brighter — it raises the brightness of the area immediately around it, so the contrast jump disappears.
Step 1: Pick the right color temperature
This is the detail most people get wrong. A LED bias lighting strip for monitor should be set to roughly 6500K (daylight white) — this matches the white point most monitors are calibrated to. A warm-white or colored strip looks nice but actually shifts how you perceive on-screen colors, which matters if you do any photo, video, or design work.
Step 2: Measure before you buy
Bias strips are sold by length and are usually cut-to-size or sold in multi-meter rolls. Measure the back perimeter of your monitor (or just the top and sides if you don’t want to go around the bottom) before ordering, and round up — running short mid-install is a common frustration.
Step 3: Mount it correctly
- Clean the back of the monitor with an alcohol wipe before applying any adhesive backing — dust is the main reason strips fall off within weeks.
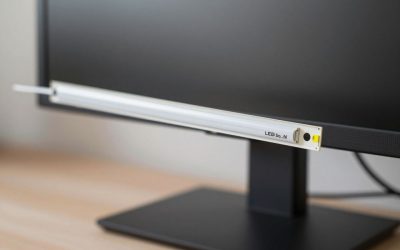
- Apply the strip facing outward/backward toward the wall, not toward your face. The light should illuminate the wall behind the screen, not shine directly at you.
- Keep the strip a small distance in from the outer edge of the monitor so it doesn’t peek out and become visible light in your peripheral vision.
Step 4: Set brightness relative to your screen, not the room
The strip should be noticeably dimmer than your monitor’s own brightness — if you can clearly “see” the strip as a separate light source rather than just a soft glow around the screen edges, it’s too bright. Most bias strips include a small in-line dimmer or remote; start low and increase gradually.
Step 5: Decide if you want screen-sync
Some bias lighting kits include a sensor that syncs the strip’s color to whatever’s on screen (useful for movies and games, less useful for spreadsheet work). For a pure productivity setup, a fixed daylight-white strip is simpler and won’t distract you with shifting colors while you’re trying to focus.
Two real products worth considering
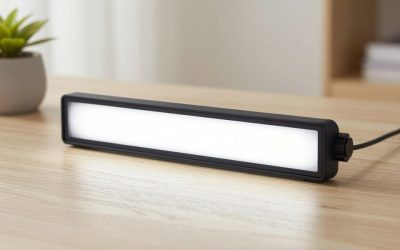
If you want a simple, fixed daylight-white strip with no extras, a basic Govee USB LED Backlight Strip covers Steps 1-4 above directly — it’s USB-powered, dimmable, and cuttable to size for most monitor perimeters. If you’d rather have the option of screen-sync for movies and games while still being able to lock it to a fixed daylight-white for work, the camera-based Govee DreamView G1 gives you both modes in one kit, at a higher price than the basic strip.
Power considerations
Most bias strips run off USB power, which means you can plug them straight into a monitor’s built-in USB port (if it has one) or a nearby USB hub — no need to find an extra wall outlet. If your desk already has a powered USB hub for other accessories, route the bias strip through that rather than adding one more adapter to the outlet strip.
Common mistakes
- Mounting the strip facing forward instead of toward the wall — this creates glare instead of reducing contrast.
- Choosing a warm-white strip for color-sensitive work and wondering why on-screen whites look slightly blue by comparison.
- Running it at full brightness, which turns a contrast-reducing tool into a second distracting light source.
Curved monitors need a different approach
A strip rated for flat panels can lift off at the tighter bend points of a curved monitor within a few weeks, since the adhesive wasn’t engineered for that radius. If your monitor is curved, check the product listing specifically for curved-screen compatibility, or expect to add a few extra adhesive dots or small clips at the curve points to keep the strip seated through temperature changes and normal vibration from typing.
FAQ
Does bias lighting use much electricity?
No — most USB-powered strips draw only a couple of watts, similar to charging a phone slowly, so the cost to run one continuously through a workday is negligible.
Can I use bias lighting on a laptop screen instead of a monitor?
It’s less practical since laptop screens are smaller and often tilt, which changes the strip’s angle relative to the wall; bias lighting is really designed for a monitor that sits in a fixed position for extended periods.
Will bias lighting interfere with webcam video quality on calls?
No, as long as the strip faces backward toward the wall as instructed — it shouldn’t be visible to or affect your webcam at all, since the light source points away from the camera, not toward it.
How long do USB bias lighting strips typically last?
LED strips are generally rated for tens of thousands of hours of use, so the adhesive backing failing from dust or age is a far more common failure point than the LEDs themselves burning out.
It’s a twenty-minute install that most people never think to do — and one of the few desk upgrades where the entire cost is under what you’d spend on lunch for the week.
FAQ
Does bias lighting use much electricity?
Can I use bias lighting on a laptop screen instead of a monitor?
Will bias lighting interfere with webcam video quality on calls?
How long do USB bias lighting strips typically last?
More from Amazon
Programs that pair well with the guide above. Offers and eligibility are set by Amazon and may change.
Free shipping on eligible items, Prime Video and more. Eligible new members can start with a free trial.
Start a Prime free trialAudiobooks and podcasts to listen to on the go. Eligible new members can start with a free trial.
Try Audible freeAd-free music streaming. Eligible new subscribers can start with a free trial.
Try Music Unlimited freeA free business account with business pricing and bulk-buying tools for work, shop or home office.
Create a business accountAs an Amazon Associate we earn from qualifying purchases.

Write Your Review
No reviews yet. Be the first to share your experience!